
Today, I want to share two recipes with you that are perfect for this time of year. One has the cool, refreshing taste of key lime, and the other is a luscious lemon treat. Both are easy enough for the kids to get involved, while being fun to make and share with dear ole' Dad! I'm pretty sure you won't have leftovers.
Here's a preview of what we'll cook today (recipes and tutorial included below):
First, we'll prepare "Easy Key Lime Pie" (recipe on page 119 of "A Pinch of This ... A Smidgen of That" cookbook):


If you like soft cookies you'll love these. Also, you aren't limited to just making lemon cookies with this recipe. Pick your flavor (chocolate, strawberry, spice, pineapple---you name it!) cake mix and you've got a great cookie that literally melts in your mouth.
First, let's begin with gathering ingredients for our Easy Key Lime Pie:

Beat softened cream cheese until smooth.

Combine sweetened condensed milk and cream cheese, blending well.

Slowly, beat in 1/2 cup of lime juice (bottled or fresh squeezed) a little at a time, blending well after each addition. You may also add some grated/zested lime peels (if desired). (I enJOY using this Pampered Chef zester for lemons and limes.)

NOTE: If you have a copy of "A Pinch of This ... A Smidgen of That" Cookbook, please note on page 119 two typos: the first is the amount of lime or key lime juice that you add---It should read 1/2 cup NOT 1 1/2 cups. Also, you need to write in the ingredients column "1- 8 oz. pkg. cream cheese, softened to room temp." I'm sorry for the typos. I tried to catch mistakes with SEVERAL proof readings before it went to print, but inevitably some slipped by me. Hopefully, if you purchased a copy, I corrected it before you got it. If not, please take time to write in these corrections. I've posted these corrections previously on the blog, but some of you may not have seen it.)
Just a quick word about the lime juice--Key lime juice is the preferred juice for making this pie. And, I used to make these pies by squeezing SEVERAL of those tiny (and very seedy) key limes and zesting the extras for garnish and filling. However, in my OLD AGE and with arthritic fingers, I decided to try a bottled juice. Now, I can tell you, it tastes just a bit different (less pungent), but the pie was still great. If you end up having to use bottled or fresh squeezed lime juice, your pie will taste more "lime" than "Key Lime", but certainly will still produce a great dessert (and no one will complain, unless that's just their nature :-). If you want to squeeze your own key limes (and deal with all those seeds), by all means, give it a try. You'll be pleased either way, I think. In your locale, it might be difficult to find fresh key limes, because they are in shorter supply and do not store well. That's where the bottled juice comes in handy. Just store your leftover juice in the refrigerator. If you don't have access to Key Lime Juice, then use the bottled Lime Juice (from the Persian lime) instead, just don't expect the finished product to taste the same as your favorite restaurant's Key Lime pie---but you just might like yours even better :-).
Read more: What is the Difference Between Key Lime Juice and Lime Juice? | eHow.com http://www.ehow.com/facts_5824461_difference-lime-juice-lime-juice_.html#ixzz1xjon9fWv

Be sure you don't forget to use only 1/2 cup (NOT 1 1/2 CUPS!!!) of the juice, whichever you decide to use!

And, be sure to add it a little at a time as you blend it into the cream cheese mixture.

Beat with mixer until very smooth and creamy, then fold in Cool Whip. (NOTE: When you "fold" in an ingredient, you do not use the mixer. Use a spatula to gently "lift and fold" the ingredient into the mixture, just until it disappears. Do not over mix.)

Just dump it all in and start folding!

You can see here that the whipped cream is beginning to blend well.

Spoon the filling (which will be very thick) into the prepared crust.

Just a quick note on the color of this pie. (And, this isn't one of my best photos for color and clarity! Sorry!) I expect good key lime pie to be a pale yellow color. The only green ingredient is the zest, which shouldn't be enough to turn the whole thing green--just faint speckles here and there, depending on how fine you zested your lime. Green key lime pies usually have food coloring added to them to make them green. If the color is important to you, food coloring will get you there. I would check the color ratio (blue to yellow) for making green and add it 1-2 drops at a time. Food coloring can go a long way. I'm not a big fan of food coloring, so I'd probably just serve the key lime pie as it is or with a garnish.

I like to just dump all the filling into the pie, then use the back of a spoon (starting at the outside edge) to swirl the filling into pretty ripples all the way to the center.

Garnish with sliced limes and/or grated lime peels. To prepare your limes, wash them well and slice thin. Slit one side of each slice up to the middle (half-way across), as in the photo.

Twist the ends in opposite directions to open up the slice and place them securely on the pie. Be creative and use as many or as few slices as you like for garnish. I usually blot these dry before securing them into the filling.

Refrigerate for at least 2 hours. Slice and add a dollop or a squirt of whipped cream and enJOY!

Store covered in the refrigerator. If you used the ready-made crusts, just wash the plastic liner and flip it over for a nifty lid to cover your pie. Crimp the edges to hold it in place.

I like to wait until I'm ready to serve the pie before I garnish with whipped cream (it tends to get drippy if it sits very long). If you don't plan on leftovers, you might try one of the garnishes below:


Don't forget to print the recipe (if you don't have the cookbook) or copy and paste it to your recipe file. (and don't forget that we aren't finished yet... We've still got to stir up some Lemon Gooey Butter Cookies! Check out the tutorial after this recipe.)
EASY KEY LIME PIE
1 pre-made
graham cracker crust
1 - 14 oz. can sweetened condensed milk
1 - 8 oz. package of cream cheese, softened to room temperature
2 cups Cool Whip (or about 1 - 8 oz. container Cool Whip) or freshly whipped heavy cream
1/2 cup lime juice
2 limes (1 for garnish, and 1 for a teaspoon of grated peels---optional)
1 - 14 oz. can sweetened condensed milk
1 - 8 oz. package of cream cheese, softened to room temperature
2 cups Cool Whip (or about 1 - 8 oz. container Cool Whip) or freshly whipped heavy cream
1/2 cup lime juice
2 limes (1 for garnish, and 1 for a teaspoon of grated peels---optional)
Beat softened cream cheese until smooth. Combine
sweetened condensed milk and cream cheese, beating until smooth. Slowly, blend in lime juice a little at a time, blending well after each addition. You may also add some grated lime peels (if desired).
Beat with mixer until very smooth and creamy, then fold in Cool Whip. (NOTE: When you "fold" in an ingredient, you do not use the mixer. Use a spatula to gently "fold" the ingredient into the mixture, just until it disappears. Do not over mix.) Spoon the filling (which will be very thick) into the prepared crust. Garnish with sliced limes and/or grated lime peels.
Refrigerate for at least 2 hours. Makes 1 pie . (Some people enJOY these frozen. I've never tried it, but you might prefer that method over storing it in the refrigerator. Come back and leave a comment, if you try this. I'd like to know what you think.)

Now, if you haven't called in your "helpers" (kids and grandkids) yet, get everyone together and put them to work on gathering ingredients for some yummy Lemon Gooey Butter Cookies! Let's get started:

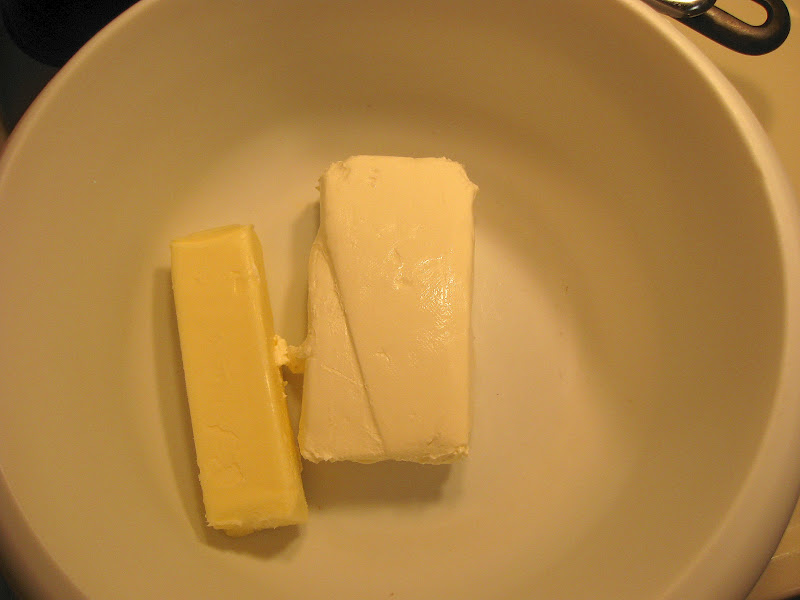
Preheat oven to 350 degrees. In a large bowl use an electric mixer to blend the cream cheese and butter until smooth.
Be sure to beat until smooth and creamy.

Beat in the egg and extracts.

This is a good time to let the kids help with the mixing.

and the dishwashing, of course! :-) I get messy when I cook!

Blend in the cake mix, a little at a time. (This will be thick, so take your time and don't overwhelm your mixer.)

Beat until the dry mix is just combined with the cream cheese. Don't over mix.
(Sorry, my flash failed to work in this next photo of the cookie dough... it's really lemony yellow, not orange!)

Place 1 cup confectioners' sugar in a small bowl (for coating the dough balls). Form the batter into tablespoon-sized balls using a cookie dipper and then coat them in confectioners' sugar.

Place coated balls on an ungreased cookie sheet, approximately two inches apart.

Bake @ 350 for 10 to 12 minutes or until the bottoms are just golden and tops are crackled but still light in color (should not have even a light brown color to them). Be careful not to overbake. Remove from oven, and while still warm on the cookie sheet, sprinkle with additional sugar, if desired.

Then remove to cooling rack or lined countertop to cool completely. The cookies will remain soft and gooey.
Whatever you decide to do for the special dads in your life, I pray you enJOY a BLESSED time with your family and friends.

Don't forget to print or save the recipe below, if you don't have the cookbook. For more information about how to get the cookbook or to email a question about a recipe, scroll down past the cookie recipe and fill in the form. Don't forget to send me your email address so I can respond.
LEMON GOOEY BUTTER COOKIES
INGREDIENTS:
1 (8 oz.) cream cheese (softened to room temperature)
1 stick margarine or butter (softened to room temperature)
1 egg
1/2 tsp. vanilla extract
1 (8 oz.) cream cheese (softened to room temperature)
1 stick margarine or butter (softened to room temperature)
1 egg
1/2 tsp. vanilla extract
1/2 tsp. lemon extract
1 (18 oz.) box Lemon Supreme Cake Mix
Confectioners' sugar for coating prior to baking (and optional dusting after baking)
INSTRUCTIONS: Preheat oven to 350 degrees. In a large bowl use an electric mixer to blend the cream cheese and butter until smooth. Beat in the egg and extracts. Then, blend in the cake mix, a little at a time. (This will be thick, so take your time and don't overwhelm your mixer.) Place 1 cup confectioners' sugar in a small bowl (for coating the dough balls). Form the batter into tablespoon-sized balls using a cookie dipper and then coat them in confectioners' sugar. Place coated balls on an ungreased cookie sheet, approximately two inches apart. Bake @ 350 for 10 to 12 minutes or until the bottoms are just golden and tops are crackled but still light in color (should not have even a light brown color to them). Be careful not to overbake. Remove from oven and while still warm on the cookie sheet, sprinkle with additional sugar, if desired. Then remove to cool completely. The cookies will remain soft and gooey.
Thanks for these easy recipes! I copied them and will be making them very soon. Not for Father's Day but soon. Maybe for my birthday. I love both lemon and lime flavored desserts.
ReplyDelete