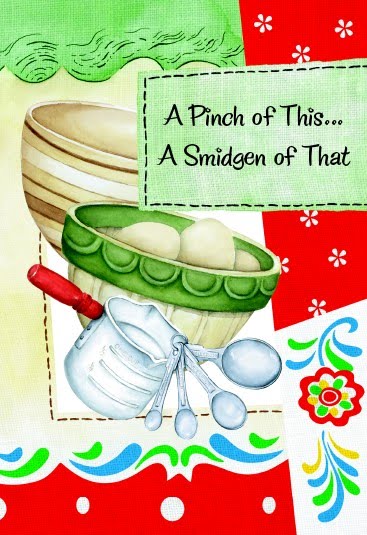

First, let's put on a our pot of stew, then we'll stir up some great homemade bread. Jam packed with veggies as well as chicken breast and tomatoes, this is a healthy, hearty quick stew. And, I promise, it's DELICIOUS! Check out the ingredients below, and we'll get cookin'!

HARVESTED CHICKEN STEW
Let's collect all our ingredients before we get too excited about eating this stew!

Next, in a large soup pot or Dutch oven, combine the onion, chicken, and celery, ...

... then add tomatoes with liquid, carrots, corn, peas and zucchini ...

(or cubed potatoes, if you want to substitute for the zucchini, like I did. I would have used the zucchini, but I didn't happen to have any in stock at the time. Besides, the Irish in me would have preferred the potatoes.).

Add chicken broth, and stir together. Simmer over medium low heat for 1/2 hour, or until vegetables are cooked and tender.

Serve with cornbread, crackers, or Downton Abbey Buttermilk Bread (recipe below after the stew recipe).

HARVESTED CHICKEN STEWIngredients:
2 cups chopped onion
2 cups cubed, cooked boneless chicken breast meat
1 cup chopped celery
2 cups whole (I used diced tomatoes) peeled tomatoes, with liquid
2 cups sliced carrots
5 cups chicken broth
1 cup sweet corn
1 cup peas
1 cup sliced zucchini (I substituted 1 cup cubed red potatoes)
2 cups cubed, cooked boneless chicken breast meat
1 cup chopped celery
2 cups whole (I used diced tomatoes) peeled tomatoes, with liquid
2 cups sliced carrots
5 cups chicken broth
1 cup sweet corn
1 cup peas
1 cup sliced zucchini (I substituted 1 cup cubed red potatoes)
Directions:
In a large soup pot or Dutch oven combine the onion, chicken, celery, tomatoes with liquid, carrots, corn, peas and zucchini (or cubed potatoes). Add the chicken broth, and stir together. Simmer over medium low heat for 1/2 hour, or until vegetables are cooked and tender. Serve with cornbread, crackers, or Downton Abbey Buttermilk Bread (recipe below).
In a large soup pot or Dutch oven combine the onion, chicken, celery, tomatoes with liquid, carrots, corn, peas and zucchini (or cubed potatoes). Add the chicken broth, and stir together. Simmer over medium low heat for 1/2 hour, or until vegetables are cooked and tender. Serve with cornbread, crackers, or Downton Abbey Buttermilk Bread (recipe below).

(Always good to have some "reminders" sticking around! LOVE sticky notes!)
Homemade bread--especially yeast breads--have always been one of my favorite things to bake and eat. I love trying new yeast bread recipes, and occasionally, I'll find one that's a "keeper." This is one of those recipes. It was easy, I had all the ingredients, and, best of all, it turned out perfect (IMHO!). Definitely a "keeper." I hope you will try it, even if you've never made homemade yeast bread before---you can do this! NOTE: I didn't change a thing in this recipe, so I'd suggest doing it exactly as directed. Most of the time when I try a recipe for the first time, I follow the ingredients and directions as they are written, then, if I make it again, I might "tweak" it just a bit, but I won't do that with this recipe. It was perfect, as is.
In the wintertime, there's nothing better than fresh, homemade yeast bread. And, it's always exciting to try new and delicious recipes.
If you watch Downton Abbey like millions of other people in America, you see Mrs. Patmore (the abbey cook) always making breads and always covered in flour. Whether it be the Edwardian era or any other era of mankind, breads have been a staple of the peoples diet. Perhaps this is one of the reasons there is an adage which states "bread is the staff of life."
This bread, known today as Buttermilk Bread, was actually known during the Edwardian era as Cultured Milk Bread. Most of the abbey's had their own dairys, thus they always had fresh milk and they made their "buttermilk" by simply adding a citric acid to it. Quite simple. In today's world many people make faux buttermilk almost the same way, by adding some vinegar to whole milk.
This is a very simple and delicious bread to make at home. If you want to see a full how-to slideshow on making Buttermilk Bread, go to the free Facebook page The Food of Downton Abbey. (Source: http://www.examiner.com/article/the-food-of-downton-abbey-buttermilk-bread) I'll include what I did in the tutorial below:
DOWNTON ABBEY BUTTERMILK BREAD

First, let's gather our ingredients (always a great idea to avoid mistakes later in the process!)...

In a large bowl, whisk the butter into the warm water until it has melted. Whisk the yeast into the butter. Let the mixture rest 5 minutes for the yeast to proof (foam).

In a medium bowl, whisk the sugar, salt and flour.

lightly whisk together your dry ingredients ...

Add all the ingredients into the yeast mixture and stir to form a dough.

It should look something like this once all the flour mixture is added ...

Place the dough onto a floured surface and knead 5 minutes. (NOTE: I left my dough in the bowl and just sprinkled a little flour over it to knead. Sprinkle only enough to keep the dough from sticking to your hands as you knead it. It saves messing up your countertop!)

Place the dough back into the bowl. (Or, if you did as I did and kneaded it in the bowl, just leave it there to rise. I added a couple of tablespoons of Crisco oil to the top of the dough and then turned it over once to coat the lump of dough.) Cover the bowl with a lint-free cloth and let rise 1 hour.
(OOPS... I forgot to take a photo of the bowl with the dishcloth draped over it... hummm, better use your imagination and pretend there's a photo here... :-).
(PHOTO OF BOWL DRAPED WITH DISHCLOTH)
Remove the risen dough from the bowl and knead a few minutes to release the air. (Again, I didn't remove my dough from the bowl. I simply pressed the air out of it and kneaded it gently in the bowl---as below.)
Remove the risen dough from the bowl and knead a few minutes to release the air. (Again, I didn't remove my dough from the bowl. I simply pressed the air out of it and kneaded it gently in the bowl---as below.)

Line the bottom of a loaf pan with parchment paper. (NOTE: I lined the bottom AND sides.) Place the dough into the lined pan and let it rise 1 hour.

Place into a pre-heated 375 degree oven and bake 40 minutes. (NOTE: At 20 minutes, my loaf was begining to get golden on top, so I covered it with a piece of foil for the remaining 20 minutes baking time.) Fresh out of the oven, it looked like this ...

Remove the bread from the oven and brush the top of the bread with some butter.

Let the bread cool in the pan 10 minutes. Remove the bread from the pan to a wire rack and brush the sides with butter.

Allow to cool until ready to slice and serve. A serrated knife (or bread knife) works well for slicing. Serve with Harvested Chicken Stew and enJOY!

Don't forget to print the recipes or copy and paste them to your recipe file for future reference.
DOWNTON ABBEY BUTTERMILK BREAD
Ingredients:
1/2 cup warm water
2 Tbs. butter, softened
2 tsp. yeast
1 cup buttermilk
2 Tbs. sugar
1 tsp. salt
3 cups flour
extra butter for brushing.
Directions:
In a large bowl, whisk the butter into the warm water until it has melted. Whisk the yeast into the butter. Let the mixture rest 5 minutes for the yeast to proof (foam).
1 cup buttermilk
2 Tbs. sugar
1 tsp. salt
3 cups flour
extra butter for brushing.
Directions:
In a large bowl, whisk the butter into the warm water until it has melted. Whisk the yeast into the butter. Let the mixture rest 5 minutes for the yeast to proof (foam).
In a medium bowl, whisk the sugar, salt and flour. Add all the ingredients into the yeast and stir to form a dough.
Place the dough onto a floured surface and knead 5 minutes. (NOTE: I left my dough in the bowl and just sprinkled a little flour over it to knead. Sprinkle only enough to keep the dough from sticking to your hands as you knead it. It saves messing up your countertop!)
Place the dough back into the bowl. (Or, if you did as I did and kneaded it in the bowl, just leave it there to rise. I added a couple of tablespoons of Crisco oil to the top of the dough and then turned it over once to coat the lump of dough.) Cover the bowl with a lint-free cloth and let rise 1 hour.
Remove the risen dough from the bowl and knead a few minutes to release the air. (Again, I didn't remove my dough from the bowl. I simply pressed the air out of it and kneaded it gently in the bowl.)
Line the bottom of a loaf pan with parchment paper. (NOTE: I lined the bottom AND sides.) Place the dough into the lined pan and let it rise 1 hour. Place into a pre-heated 375 degree oven and bake 40 minutes. (NOTE: At 20 minutes, my loaf was begining to get golden on top, so I covered it with a piece of foil for the remaining 20 minutes baking time.)
Remove the bread from the oven and brush the top of the bread with some butter.
Let the bread cool in the pan 10 minutes. Remove the bread from the pan to a wire rack and brush the sides with butter. Allow to cool until ready to slice and serve. A serrated knife (or bread knife) works well for slicing. Call in the kids and grandkids and enJOY!


