Welcome!

Welcome! :-) Whatever brought you here today wasn't an accident, and I'm so glad you stopped by. I'm always glad to have folks drop in my kitchen for a visit and hope you'll feel right at home. We always have an ample supply of fresh lemonade, sweet tea, and a pot of coffee brewing along with a sideboard full of baked treats for you to enJOY while you're here. Relax and take your time as we visit and catch up on the latest news. Don't forget to email and let me know what's going on in your world, as well. And, come back soon!


Showing posts with label cheesecake. Show all posts

Monday, September 26, 2011

By Popular Demand


They say a picture is worth a thousand words, and it must be true. You never know what kind of response a photo will evoke when you post it on the Internet. I posted a picture of a Reese's Peanut Butter Cheesecake that I made for a shower last week, and I've had more email requests for the recipe than I've had time to answer. So, today, I decided to try and remember what I did and "write it down" for those of you who asked for it. Actually, I modified the "My Favorite Cheesecake" recipe (P. 103) in "A Pinch of This... A Smidgen of That" cookbook, so that's where we'll begin... It's basically a "New York" style cheesecake with some optional topping ingredients thrown in, but when I decided to make something "chocolate and peanut butter," I had to figure out a way to work with the recipe. I hope you can make sense out of my "notes" and "optional additions." If you can't, you can always email or call me.

This won't be a "normal" blog with tutorial photos, because I didn't take photos of the process when I was making the cheesecake. I only photographed the finished product at the shower. So, I apologize for not having step-by-step instructions for you. As I said, holler at me, if you have further questions. And, I hope it turns out as YUMMY for you as it did for us. We enJOYed eating the leftovers! I had enough batter to not only fill my sprinform pan and bake the very thick cheesecake, but also to fill 24 cupcake holders! I used Oreo Cookies (whole ones) for the bottom crusts and drizzled melted semi-sweet chocolate over the top of the "mini-cheesecakes." They were just as yummy as the full-sized version.

Ok, here's the recipe... and I warn you, I'm a "detail" person, so it's going to look long and scary at first, but it's really EASY, I promise. I just like to go into lengthy details so you understand what to do! :-)

MY FAVORITE CHEESECAKE


Crust Ingredients: (see options below, if you're making Reese's Peanut Butter Version)

Graham Cracker Crumbs (or a large prepared graham cracker crumb pie crust dumped and pressed into your greased springform pan).
2 Tbsp. sugar
2 Tbsp. butter, melted

In a medium bowl, mix graham cracker crumbs with sugar and melted butter. Press onto bottom and part of the way up the sides of a springform pan.

Cheesecake Ingredients: (see additional ingredients below if making Reese's PB Version, or if you want to make a different topping for the plain cheesecake.)
1 lb. carton small curd cottage cheese, well drained, then blended until smooth
2 - 8 oz. Pkgs. Cream cheese, softened
1 ½ cups granulated sugar
4 eggs
1/3 cup cornstarch
1 T. lemon juice
1 tsp. vanilla
½ cup salted butter, melted
1 – 16 oz. carton sour cream

OPTIONAL: Sour Cream Topping:
1 - 16 oz. carton sour cream
¾ to 1 Cup sugar
1 tsp. clear vanilla

OPTIONAL: Orange Topping:
1/2 cup ground tangerines or oranges
1 cup sugar

OPTIONAL for a REESE'S PEANUT BUTTER CHEESECAKE:
  • 2 OREO Cookie Crumb Crusts, dumped into the springform pan and pressed until firm in the bottom and up the side of the pan.
  • 1 Cup Creamy Peanut Butter
  • 8 oz. Dark Baking Chocolate (8 Squares melted), to coat the inside of the crust
  • Sufficient Reese's Peanut Butter Cups (I quartered the small ones... 10-15 before I quartered them) to cover the bottom of the crust and chocolate coating.
  • Mini-Reese's or quartered pieces/chunks of Reese's candies to place randomly over the top after the cheesecake is finished baking.
  • 1/2 Cup semi-sweet chocolate chips, melted (to drizzle on top for decoration)
  • Icing for garnish around the bottom (optional)
  • 24 whole OREO COOKIES to make Mini-cheesecakes with leftover filling (optional)
BAKING DIRECTIONS (FOR ALL VERSIONS!):
Preheat oven to 325 degrees. Place a shallow pan of water in the lower rack or bottom of your oven. This will add moisture while baking and keep your cheesecake from cracking on top. Be sure to add enough water to keep it from going dry during baking. I usually use a jellyroll pan (like a large deep cookie sheet) and add it as full as I can with water. PREPARE a graham cracker CRUST in the bottom of a LARGE springform pan. (See back of Nabisco Graham Cracker Crumbs box for recipe. OR, do as I do--- purchase a large pre-made graham cracker crust, or a couple of small crusts, and dump them into the springform pan after you spray the bottom and side really well with nonstick coating. Use your fingers and palm of your hand to press the crust firmly until smooth and well packed in the bottom of the pan. Set aside until you mix the filling. It is NOT necessary to bake this before pouring in the filling.)
NOTE: IF YOU ARE MAKING THE REESE'S PEANUT BUTTER VERSION, YOU WILL NEED TO USE THE OREO COOKIE CRUMB CRUST HERE INSTEAD OF GRAHAM CRACKER CRUMBS. I USE TWO OF THE PREMADE CRUSTS, WHICH ARE SMALL. THEY WILL FILL THE BOTTOM AND PART OF THE WAY UP THE SIDES. DON'T WORRY IF THEY DON'T GO ALL THE WAY TO THE TOP. ONCE LINED, MELT 8 OZ. --or 8 squares-- BAKING CHOCOLATE AND SPREAD OVER THE BOTTOM OF THE CRUST, THEN, REFRIGERATE UNTIL READY FOR FILLING. THIS ALLOWS THE CHOCOLATE TO HARDEN BEFORE YOU ADD THE FILLING.

PREPARE FILLING (for ALL VERSIONS): Blend the drained cottage cheese (don’t worry if it doesn’t all drain out.) in a food processor (blender) until very creamy (looks like sour cream when ready). Beat cream cheese at high speed of mixer until creamy. Add the blended cottage cheese and mix well. (NOTE: IF MAKING REESE'S PEANUT BUTTER VERSION, ADD PEANUT BUTTER WITH THIS CREAM CHEESE MIXTURE AND BLEND WELL.)  Add sugar and beat well. Add eggs, one at a time, beating after each addition. Reduce speed to low. Add cornstarch, lemon juice, and vanilla. Blend well. Add melted butter and sour cream. Mix until all is well blended. Pour into prepared pan. (NOTE: IF MAKING REESE'S PB VERSION, YOU ONLY NEED TO FILL YOUR PAN ABOUT 3/4 FULL. YOU WILL HAVE ENOUGH LEFTOVER FILLING TO MAKE SOME MINI-CHEESECAKES. I USED MEDIUM SIZED CUPCAKE TINS LINED WITH CUPCAKE PAPERS. I HAD JUST ENOUGH TO FILL 24 CUPCAKES. I FILLED THEM ABOUT 2/3 FULL. I BAKED THE CUPCAKES AT 325 DEGREES FOR ABOUT 25-30 MINUTES. AFTER THESE BAKED, I DRIZZLED THE TOPS OF SOME WITH WITH MELTED CHOCOLATE AND GARNISHED OTHERS WITH A SOLID LAYER OF MELTED CHOCOLATE AND A "STAR" OF PIPED ICING.) Bake cheesecake for 70 minutes at 325. Turn off oven and leave cheesecake inside with oven door closed for at least 2 hours (overnight is best). Remove and cool completely before removing sides of pan. (I like to let mine sit on a cookie sheet for a while --until it comes to room temperature---before I remove the side of the pan.)

NOTE: If you choose to top the cheesecake with a sour cream topping instead of the orange topping below, you will need to add the topping as soon as it finishes baking (or within the first 30 minutes if you need time for it to settle a little to give space at the top) and leave it in the 325 degree oven for about 10 minutes before turning the oven off.

FOR SOUR CREAM TOPPING:
Mix well:
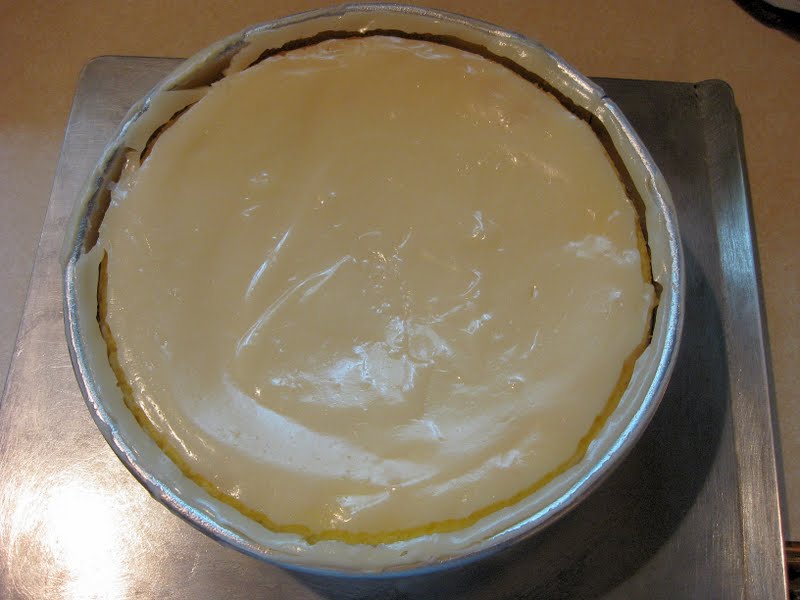
1 - 16 oz. carton sour cream blended with ¾ to 1 Cup sugar and 1 tsp. vanilla. Spread evenly from the outside rim (touching rim) to the inside middle. Smooth flat on the surface. Return the cheesecake to the oven for a final 15 minutes to “set” the topping. Turn the oven off and DO NOT OPEN THE DOOR. Allow it to sit for about 2 hours (or overnight) to cool before removing to cool at room temperature. Once cool, slice a sharp knife around the rim of the springform pan and open the spring latch to remove (lift straight up for smoother sides).

FOR ORANGE TOPPING:
(NOTE: I’ve never used this. I always use the sour cream topping. However, a friend--Barbara--makes this, and it is delicious. It’s just too much trouble for me.) Combine ground fruit with sugar and stir over moderate heat until sugar melts. Cook, stirring frequently, until it thickens. Cool and spoon over cheesecake. Don’t overcook or it will be hard. (You might also use orange marmalade for this step.)

FOR REESE'S PEANUT BUTTER CUPS TOPPING:
As soon as the cheesecake is done (about 70 minutes), open the oven briefly and randomly place mini-Reese's cups (or chopped Reese's cups) around over the top of the cheesecake, DO NOT REMOVE THE CHEESECAKE FROM THE OVEN. Do this as quickly as possible and close the door. Turn off the oven and allow the cheesecake to sit in the oven for 1 - 2 hours before removing it to a cookie sheet or countertop to cool to room temperature.  Once cool, slide a sharp knife around the rim of the springform pan and open the spring latch to remove (lift straight up for smoother sides). Melt the semi-sweet chocolate chips in your microwave and drizzle one direction then the opposite direction over the top and down the sides. Refrigerate and enJOY! :-)


Thank you to all who commented on the photo and requested the recipe. Hope you enJOY making sharing your creation with your family.
Blessings!
Pat

Wednesday, June 29, 2011

Summertime Treats and Staying Cool!

Seems like the "Dog Days" of summer have arrived early this year. Sultry, over-90-degree temps, high humidity, stagnant air all make us long for the cooler, crisper air of fall. Until then, we must survive the heat, and what better way to do so than with a tall glass of cold lemonade or a piece of creamy, cool lemon cheesecake?
Lemons always come to mind when I think of a cool summertime dessert. What do you think of when you want something cool and refreshing to eat or drink during hot weather? (Leave your comments below.)

Although lemons are most at home in the kitchen, throughout the centuries, lemons have been used for many nonculinary purposes—as an epilepsy remedy, a toothpaste, an invisible ink and a bleaching agent as well as in witchcraft. Originating in Southeast Asia, the lemon is now cultivated in tropical and temperate climates around the world, with California being the leading producer in the United States. Lemons range in size from that of a large egg to a small grapefruit. Some are thin skined while others have very thick rinds, which are used to make candied lemon peel. Lemons are available year-round with a peak during the summer months. When choosing lemons, pick fruit with smooth, brightly colored skin with no tinge of green (which signals underripeness). Lemons should be firm, plump and heavy for their size. Lemons can be refrigerated in a plastic bag for two to three weeks. The lemon has a multitude of culinary uses for dishes sweet to savory, as well as a flavoring in many drinks. An excellent source of vitamin C (one provides 40 to 70 percent of the minimum daily requirement), the lemon loses 20 percent of vitamin C after only 8 hours at room temperature or 24 hours in the refrigerator. (Source: http://www.foodterms.com/encyclopedia/lemon/index.html)

Lemon juice is available both frozen and bottled but doesn't compare in quality to that of fresh squeezed. Some enJOY it in iced tea; some squeeze it on salads and sprinkle it on fried fish to help cut the grease. You may not realize that lemon juice has many uses besides being a culinary additive. Check out these possibilities:
1. Give Your Hair a Beautiful Shine
Spritzing lemon juice on your hair, then going outside in the sunshine will give you natural-looking highlights. Also, rinsing your hair with lemon juice will make it shiny. The acidic juice will take out shampoo and hair care product residue. For a healthy shine, mix up a 1/4 cup of lemon juice in 1 cup of water.
2. Remove Tarnish From Copper and Brass
Mix up 1/4 cup of table salt and just enough lemon juice to make a paste. Then, apply a coating of this onto any tarnished copper or brass pots, pans and other items you may have. Leave the lemon juice/salt paste set for five to ten minutes. Next, wash the item in warm tap water and then rinse it well. Use a soft, clean cloth to buff it dry. If any tarnish remains, repeat the process again.
3. Use Lemon Juice to Get You Going
Lemon juice is a natural laxative that has no side effects. Just pour 2 tablespoons of fresh lemon juice into an 1 cup of warm water. Drink it in the morning when you first get up. The citrus juice will help regulate your digestive system.
4. Clean Up Household Grease Naturally
Mix up a tough solution of lemon juice and tap water, and your stove, countertops and appliances will be shining like new. Pour a 1/4 cup of lemon juice in a spray bottle, then fill it up with tap water. Shake it a few times to mix the solution, then use it to remove stubborn grease.
5. Disinfect  and Deodorize Your Kitchen Cutting Board
Wash your cutting board in sudsy water, then spray it lightly with pure lemon juice and rinse it well.. Allow the cutting board to dry thoroughly before you put it away, the bacteria- as well as any onion or meat odors and bacteria- should be gone.
6. Remove Sticky Pine Tar From Your Hands
If you've ever worked with fresh pine boughs at Christmas, you know the sticky mess they make. It's almost impossible to get off your hands. Try scrubbing your hands with a mixture of lemon juice and table salt. The pine tar comes right off!
7. Silence a Hacking Cough and Heal a Sore Throat
Mix up 2 teaspoons of lemon juice and 1/2  teaspoon of honey together. Swallow the tasty mixture and you should feel better soon. If needed, repeat the process in thirty minutes.


It's amazing how the lemon can go from a tart, overly tangy, almost bitter fruit to a refreshing dessert when sugar is added. Lemonade is the perfect refreshing summer time drink.


Let's make a tall pitcher of refreshing lemonade, so you can sip on it while we collect our ingredients for today's Lemon Cheesecake.

If you have the cookbook ("A Pinch of This... A Smidgen of That"), you can find my "Lazy Day Lemonade" recipe on page 10. If you don't have the cookbook and would like a copy, see the information below (at the end of this blog) about ordering.

LAZY DAY LEMONADE

In a 1-gallon container, combine 1 1/2 cups Real Lemon lemon juice (or the Kroger or Wal-Mart bottled juices work well, too) along with 2 1/2 cups sugar and 1 large lemon sliced or chunked. Fill the container half-way to the top with cold water. Replace the lid and shake well or stir well to mix (if you don't have a lid :-). Fill all the way to the top with water and mix again. Refrigerate until cold. Serve over ice. (Mix well before pouring into glasses.) EnJOY! :-)


Now that you have something to sip on, let's get started on that Lemon Cheesecake!
Collect your ingredients: (They are listed below along with the complete recipe. This one IS NOT in the cookbook, so be sure to copy and paste it to your word processor and save it or print it out.)

Preheat oven to 325 degrees. Place a shallow pan of water in the lower rack or bottom of your oven. This will add moisture while baking and keep your cheesecake from cracking on top. Be sure to add enough water to keep it from going dry during baking. I usually use a jellyroll pan (like a large deep cookie sheet) and add it as full as I can with water. You'll see a pix of this when I put the cheesecake in the oven. (OOPS! I forgot to take one before I put it in the oven :-).

Spray bottom and side of a 10-inch springform pan with baking spray that includes flour. Or grease well with Crisco solid. (My springform pan came with instructions not to use canned sprays, so I use solid vegetable shortening.)

Don't know if you can see it well enough to read the Doughmakers label on the springform clip (BELOW), but I highly recommend these pans.  Doughmakers produces solid aluminum cookie sheets, pizza pans and specialty cake pans (like springform pans) that have what's called the "Original Pebble Pattern," a unique textured surface which gives Doughmakers pans an easy release. I think they bake more evenly than other pans. (NOTE: I am not being compensated for making this statement. I just happen to like the pans.)

Okay, on with the recipe! Fingers came before spatulas, right? :-) Swab that pan really well with shortening.

Once it's well greased, shake a light coating of flour inside and tap the pan to remove the excess.

It should look something like this (below) when the pan is ready to fill. Normally, when I bake cheesecakes with graham cracker crusts, I do not use the "grease and flour" method. (See the cookbook for "My Favorite Cheesecake" recipe, p. 103... and holler at me if you ever have any questions.) But, since this is using a cake mix base for a crust, I do not want it to stick to the pan.

Reserve 1/4 c. of the cake mix; set aside.
In a large bowl, beat remaining cake mix, butter and lemon peel with mixer on low speed until crumbly.

It should look like this...

 Press in bottom and 1 1/2 inches up side of pan. Set aside until you mix the filling. It is NOT necessary to bake this before pouring in the filling.

Just keep pressing and smoothing, keep smoothing, (you'll feel like "Dori" on "Finding Nemo"!)...

In the same large bowl, beat reserved cake mix, cream cheese, sugar, pudding, sour cream, and eggs on medium speed until smooth and creamy.

Pour over crust.

Bake 80 to 90 minutes or until edges are set but center jiggles slightly when moved. (Notice the pan of water on the rack under the cheesecake.)

Turn off oven and leave cheesecake inside with oven door closed for 2 hours. Remove and cool completely before removing sides of pan.
(NOTE: If you choose to top the cheesecake with a sour cream topping (as I did in the photos) instead of piping whipped cream topping around the edges---you COULD do BOTH, if you choose!!---, you will need to add the sour cream mixture as soon as the cheesecake finishes baking (or within the first 30 minutes after it has baked, if you need time for it to settle down a little to give space at the top) and leave it in the 325 degree oven for about 10 minutes BEFORE turning the oven OFF. For SOUR CREAM TOPPING: Mix well 1 - 16 oz. carton sour cream blended with ¾ to 1 Cup sugar and 1/2 tsp. vanilla, 1 tsp lemon flavoring. Spread evenly from the outside rim (touching rim) to the inside middle. Smooth flat on the surface. Return the cheesecake to the oven for a final 10 - 15 minutes to “set” the topping. Turn the oven off and DO NOT OPEN THE DOOR. Allow it to sit for about 2 hours to cool before removing to completely cool at room temperature. Once cool, slide a sharp knife around the rim of the springform pan and open the spring latch to remove (lift straight up for smoother sides).
(Photo below shows cheesecake after sour cream topping was added -- before the additional 10 - 15 minutes of baking time.)

Remove cheesecake from oven; place on cooling rack. After 2 or more hours, without releasing side of pan, run knife around edge of pan to loosen cheesecake. Cool in pan on rack at least another 30 minutes.

Remove sides of pan. Cover loosely; refrigerate at least 4 hours or overnight. Pipe or spoon whipped topping, if desired, around outside edge of cheesecake. Store in refrigerator. 

Here's one I made for Easter Dinner...

Here's a pix of one with whipped cream piped on the top edges...

Are you saying, "YUMMM!" yet?

I hope you and your family are enJOYing your summer together and making some special memories in the kitchen. BLESSINGS to you until next time!


Lemon Cheesecake
Crust 1 box Duncan Hines Classic Yellow OR Lemon Supreme Cake Mix
1/2 c. butter, softened
1 tsp. grated lemon peel

Filling
2 pkgs (8oz. each) Cream Cheese, softened
3/4 c. sugar
3 containers (from 4-pack) (3.5 oz each) lemon pudding (OR, substitute 10.5 oz. from 1 small box Lemon Instant Jello Pudding mix, made according to directions)
1/2 c. sour cream
3 eggs
2 c. Cool Whip whipped topping

Directions
Preheat oven to 325 degrees. Place a shallow pan of water in the lower rack or bottom of your oven. This will add moisture while baking and keep your cheesecake from cracking on top. Be sure to add enough water to keep it from going dry during baking. I usually use a jellyroll pan (like a large deep cookie sheet) and add it as full as I can with water.

Spray bottom and side of a 10-inch springform pan with baking spray that contains flour. Or grease well with Crisco solid and lightly flour, tapping the pan to remove the excess. (My springform pan came with instructions not to use canned sprays, so I use solid vegetable shortening.) Reserve 1/4 c. of the cake mix; set aside. In a large bowl, beat remaining cake mix, butter and lemon peel with mixer on low speed until crumbly. Press in bottom and 1 1/2 inches up side of pan. Set aside until you mix the filling. It is NOT necessary to bake this before pouring in the filling.

In the same large bowl, beat reserved cake mix, cream cheese, sugar, pudding, sour cream, and eggs on medium speed until smooth and creamy. Pour over crust.

Bake 80 to 90 minutes or until edges are set but center jiggles slightly when moved. Turn off oven and leave cheesecake inside with oven door closed for 2 hours. Remove and cool completely before removing sides of pan.

(NOTE: If you choose to top the cheesecake with a sour cream topping (as I did in the photos) instead of piping whipped cream topping around the edges, you will need to add the sour cream mixture as soon as the cheesecake finishes baking (or within the first 30 minutes after it has baked,  if you need time for it to settle down a little to give space at the top) and leave it in the 325 degree oven for about 10 minutes BEFORE turning the oven OFF. For SOUR CREAM TOPPING: Mix well 1 - 16 oz. carton sour cream blended with ¾ to 1 Cup sugar and 1/2 tsp. vanilla, 1 tsp lemon flavoring. Spread evenly from the outside rim (touching rim) to the inside middle. Smooth flat on the surface. Return the cheesecake to the oven for a final  10 - 15 minutes to “set” the topping. Turn the oven off and DO NOT OPEN THE DOOR. Allow it to sit for about 2 hours to cool before removing to cool at room temperature. Once cool, slide a sharp knife around the rim of the springform pan and open the spring latch to remove (lift straight up for smoother sides).

Remove cheesecake from oven; place on cooling rack. After 2 or more hours, without releasing side of pan, run knife around edge of pan to loosen cheesecake. Cool in pan on rack at least another 30 minutes. Remove sides of pan. Cover loosely; refrigerate at least 4 hours or overnight. Pipe or spoon whipped topping, if desired, around outside edge of cheesecake. Store in refrigerator.