The things I remember most were the Easter Egg Hunts (at school and at church), time spent with family, and my mama's Easter meal (especially her homemade rolls). Although I lost my belief in the Easter Bunny many years ago, and the tradition has lost most of it's childhood magic, I can still recall all of the happiness and love that Easter Sunday brought. Now that I'm an adult and now that my mama and daddy are in Heaven, Easter holds a totally different meaning for me and has become even more special.
For many people, Easter is all about a magical bunny that visits in the night, leaving candy and colorful eggs in his wake. But for Christians, Easter is so much more. Easter Sunday is the day that we celebrate the resurrection of Christ after the crucifixion. It's the day that we celebrate Christ overcoming death and sin for us. As we celebrate new life, we can look forward to Heaven and all the BLESSINGS it will bring someday.
Easter is the most important religious holiday for Christians. It is full of HOPE and much JOY. Christians believe that Jesus was resurrected from the dead on the "third day" and celebrate this resurrection on Easter Sunday, just after Good Friday. The date of Easter varies between 22 March and 25 April in Western tradition, and between 4 April and 8 May in Eastern Christianity. (For more details, see: http://en.wikipedia.org/wiki/Easter . Also, listen to this song: http://www.bing.com/videos/watch/video/in-christ-alone-by-newsboys/fa0a6cd15df76c89ba79fa0a6cd15df76c89ba79-553490121531?q=In+Christ+Alone,+Youtube&FORM=VIRE1 ) This year, we will celebrate Easter on April 24. How are you preparing for the celebration?
With Spring officially here and with Easter just around the corner, what better way to prepare for the season of rebirth and renewal than with some scrumptious homemade rolls? I’m happy to help kick your taste buds into high gear and prepare you for this wonderful holiday of HOPE and JOY. So sit back, relax with a nice cup of coffee or tea, and imagine serving your friends and family these fluffy, buttery rolls as you gather around your table on Easter Sunday. You might create some memories for someone to treasure!
THE BEST ROLLS IN THE WHOLE WORLD
First, let's gather the ingredients and we'll get started:
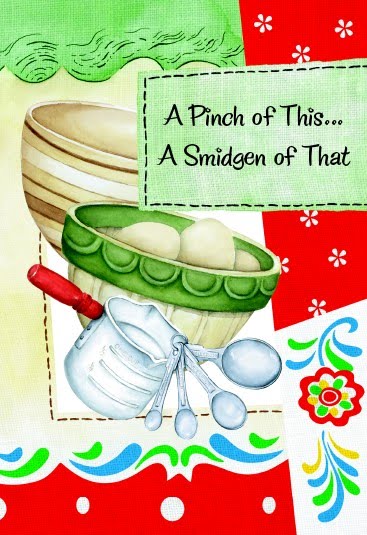
(NOTE: The recipe is on page 84 of "A Pinch of This... A Smidgen of That," but you can also find the complete recipe below, after the tutorial. You can copy and paste it to your word processor and print or save your own copy, if you don't have the cookbook.)
Gather these INGREDIENTS: 2 - cups warm water; 2/3 - cup nonfat dry milk; 2 - tablespoons dry yeast (2 tablespoons =2 packages); 1/4 - cup sugar; 2 - tsp salt; 1/2 - cup butter; 1 - egg; 5 to 5 1/2 - cups all purpose flour; 1 stick butter, for slathering hot rolls fresh from the oven
In a LARGE glass or stone bowl, combine water and dry milk. (I set my bowl in a sink partially filled with very warm tap water to keep the bowl warm.) Stir until dissolved.
Add sugar, salt, butter, egg, yeast, and 2 cups flour.
Whisk well until ingredients are wet, then for a minute or two extra, just to be sure you get out all the lumps and it's really smooth.
Add 2 more cups of flour, and mix with a large spatula (it's too much for your whisk) until ingredients are wet and continue mixing one or two additional minutes after that to incorporate all the flour and get it smooth and pasty. Add remaining 1 1/2 c. flour and again work it in well, as before.
Once combined, don't worry if it's still a bit sticky. Just clean the sides of the bowl, clean your spatula onto the lump of dough, and pour about a tablespoon of Crisco oil over the dough, using your fingertips to spread it around over the top to cover. Grasp dough with oiled hands and turn it over to oil the bowl. Turn over once so dough is covered with oil.
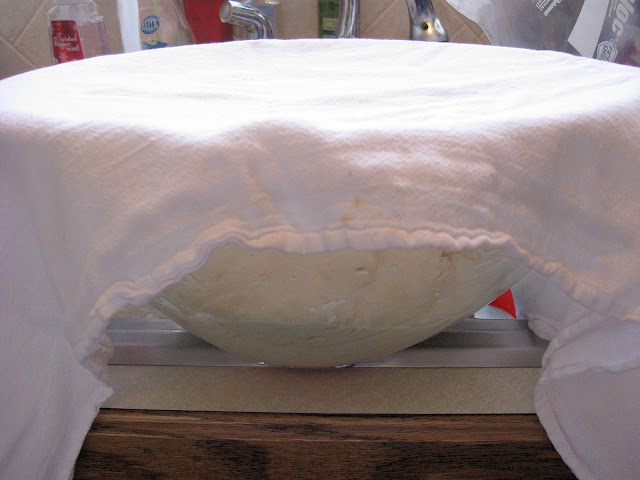
Cover with a lint-free tea towel, and let rise in a warm place (as I said, I leave it sitting in a sink full of warm water) until double in size.
Once risen to double, or to the top of the bowl, scrape dough out of the bowl onto a floured surface. (You can lay out two strips of waxed paper side-by-side, overlapping a little, and cover it with flour to do this. Then, when you're through, just pick up your mess and toss in the trash.) Roll out dough to a rectangle that's about 1/2 inch thick, and brush with melted butter. (I usually melt about 1 stick of butter to cover the whole area of rolled dough.)
Using a pizza cutter, cut rolls into desired shape and size.
TIPS ON CUTTING: To cut my rolls after rolling them out in flour, I use my hand to measure the length and width of the strips. My thumb is the width, and from my thumb to the end of my index finger is the length (about 2 1/2 X 5 inches rectangle). I cut all one direction, then the other to make the small rectangles, then roll them up like crescent rolls, tucking the end under the roll when I place it on the pan. To space these, I leave a thumb's width (almost an inch) between them all around. They will use all the space you can give them to rise. Have your butter ready to slather them on top when they come out of the oven.
Place on a greased (with Crisco solid) or parchment paper lined baking pan.
Cover with towel and let rise in warm place until rolls are doubled in size.
Preheat oven to 375 degrees F.
Bake at 375 degrees for 15-20 minutes or until golden brown. Brush with additional butter while hot.

Serve HOT with your favorite meal (or microwave and serve with ham inside for breakfast sandwiches).
Serving Suggestion: Meatloaf, boiled new potatoes, and seasoned green beans...

INGREDIENTS:
2 - cups warm water
2/3 - cup nonfat dry milk
2 - tablespoons dry yeast (2 tablespoons =2 packages)
1/4 - cup sugar
2 - tsp salt 1/2 - cup butter
1 - egg
5 to 5 1/2 - cups all purpose flour
1 stick butter, for slathering hot rolls fresh from the oven
DIRECTIONS:
In a LARGE glass or stone bowl, combine water and dry milk. (I set my bowl in a sink partially filled with very warm tap water to keep the bowl warm.) Stir until dissolved. Add sugar, salt, butter, egg, yeast, and 2 cups flour. Whisk well until ingredients are wet, then for an additional minute or two, just to be sure you get out all the lumps and it's really smooth. Add 2 more cups flour, and mix with a large spatula (it's too much for your whisk) until ingredients are wet and one or two minutes after that to incorporate all the flour and get it smooth and pasty. Add remaining 1 1/2 c. flour and again work it in well, as before. Once combined, don't worry if it's still a bit sticky. Just clean the sides of the bowl, clean your spatula onto the lump of dough, and pour about a tablespoon of Crisco oil over the dough, using your fingertips to spread it around over the top to cover. Grasp dough with oiled hands and turn it over to oil the bowl. Turn over once so dough is covered with oil. Cover with a lint-free tea towel, and let rise in a warm place (as I said, I leave it sitting in a sink full of warm water) until double in size.
Once risen to double, or to the top of the bowl, scrape dough out of bowl onto floured surface. (You can lay out two strips of waxed paper side-by-side, overlapping a little, and cover it with flour to do this. Then, when you're through, just pick up your mess and toss in the trash.) Roll out dough to a rectangle that's about 1/2 inch thick, and brush with melted butter. (I usually melt about 1 stick of butter to cover the whole area of rolled dough.) Using a pizza cutter, cut rolls into desired shape and size. Place on a greased (with Crisco solid) or parchment paper lined baking pan. Cover with towel and let rise in warm place until rolls are doubled in size. Bake at 375 degrees for 15 to 20 minutes or until browned. Brush with melted butter while hot.
TIPS ON CUTTING: To cut my rolls after rolling them out in flour, I use my hand to measure the length and width of the strips. My thumb is the width, and from my thumb to the end of my index finger is the length (about 2 1/2 X 5 inches rectangle). I cut all one direction, then the other to make the small rectangles, then roll them up like crescent rolls, tucking the end under the roll when I place it on the pan. To space these, I leave a thumb's width (almost an inch) between them all around. They will use all the space you can give them to rise. Have your butter ready to slather them on top when they come out of the oven.
TIPS ON FREEZING: After shaping the rolls place them 2 inches apart on a waxed paper-lined baking sheet. Place the rolls in the freezer and freeze until firm. When the rolls are firm, transfer to a large zip lock freezer bag. Date and freeze for up to 4 weeks. Great to do this when getting ready for the Holidays or when taking meals to needy families. TIPS ON USING FROZEN ROLLS: Arrange frozen rolls 2 inches apart on baking sheets coated with nonstick cooking spray or covered with parchment paper. Cover rolls with plastic wrap coated with baking spray. Place in a warm place and let the rolls rise until doubled in size. Bake at 375 degrees for 15-20 minutes or until golden brown. Brush with additional butter while hot.


Hello! :) This is a very intriguing blog topic. I look forward to reading more! My grandma used to cook like this! We'd ask her for a recipe for something she made and she'd pause and say, "Well... next time I make it, I'll have to write it down for you. I don't use a recipe!"
ReplyDeleteMay I make a suggestion about your site, though? It's extremely hard to navigate with all of the tags and subscribe features at the very bottom. Have you thought about using sidebars to put that sort of stuff in? It would make a huge difference in helping people find what they're looking for and know quickly how to subscribe.
Thanks, Jennifer! And, especially "thank you" for the site suggestion. I truly can use all the help I can get in designing this site. I'm not sure what "blogspot" has available, but that's one area I do plan to investigate. I liked your suggestions, and they make a lot of sense. Thank you for taking time to leave a comment and for visiting the site. Blessings!! Pat
ReplyDeletePatricia your rolls look really yummy!
ReplyDeleteOh my goodness! These look just like the rolls that my mother in-law makes. She won't give anyone the recipe. I will try to make these (hopefully I won't mess them up!) and see if my husband likes them as much as his mom's. :) Thanks for sharing!
ReplyDeleteKara, wouldn't your MIL be surprised if you invited her over for dinner and served these rolls? I promise you, no way can you mess these up! Just follow the directions (look at the photos), and if worse comes to worse, HOLLER at me! :-) I'll get you through this! :-)
ReplyDeleteThanks for stopping by.
Blessings,
Pat