Welcome!

Welcome! :-) Whatever brought you here today wasn't an accident, and I'm so glad you stopped by. I'm always glad to have folks drop in my kitchen for a visit and hope you'll feel right at home. We always have an ample supply of fresh lemonade, sweet tea, and a pot of coffee brewing along with a sideboard full of baked treats for you to enJOY while you're here. Relax and take your time as we visit and catch up on the latest news. Don't forget to email and let me know what's going on in your world, as well. And, come back soon!


Showing posts with label peanut butter. Show all posts

Thursday, April 17, 2014

A Pinch of Love, A Smidgen of Joy - Easter and Peanut Butter Cookies


Easter is one of those holidays, much like Christmas, where you don't fully understand its importance until you're an adult. When you're a child, you dress up in your best clothes for Easter Sunday and hear the stories of the resurrection of Christ in church. You also see the non-religious side of things, with the Easter bunny, hiding and seeking eggs, and receiving egg-shaped chocolates and candies in your Easter basket. Your brother and you fight over who gets the Cadbury Chocolate Eggs. Your parents take your family on an Easter picnic lunch of fried chicken and the fixings after Sunday church service. You go about the holiday, enjoying nature and the pretty Spring weather. But, especially when you're a child, it's hard to really take to heart the importance of Easter and what it means at its core.



Not to get too terribly deep (this is a food blog after all), but our family found real importance in these things, like the true meaning of Christian holidays. (See Momma's blog post last year on Easter.) I think as kids, we have this innocent idea of what life and celebrating holidays is about. And when we grow up, we realize that the things our parents taught us and by taking us to church at an early age was one of the best things they could ever do for us. I'm thankful for my Momma and Daddy and their strong faith and respect for the Bible and to follow its teachings. The truth of the matter is, Christ died for us and saved us from a life of sinfulness, and then He rose from the dead. Easter both commemorates and celebrates that truth. Of course that's a lot to swallow as a child. So maybe it's appropriate that you're introduced to these things as kids and only really understand it when you're older. It's about the gravity of what God did for us by sending his Son to die for us. It's both heartbreaking and life saving.

I'm so thankful to understand the true meaning of Easter. The chocolate eggs, the picnics and fried chicken, the bunny rabbits - that's all fun to enjoy. It's because of Christ that we can enjoy those things. Because this is my first Easter without my Momma, the truth of Christ's resurrection has held an even more crucial place in my life. I know that Momma is in Heaven with God. I know that because God sent his Son to die for us, we can be saved from an eternity apart from Him. And I know my Momma believed in her Savior and is with Him today. I know I will see God someday too, and I'll see my Momma again. That gives me so much JOY and reason to celebrate! It is with that hope that I hold on to and can fully experience the wonderful truth of Jesus's death and resurrection. That He lives. And she is with Him. And my heart is at peace knowing that truth.


This truth is reason for celebration, and Momma always said our family celebrates best with food - especially sweet desserts! One of our family's all-time favorite desserts is Peanut Butter Cookies. I can't tell you how many times I've eaten Momma's Peanut Butter Cookies over the years. Baked or raw dough, I love it all. And so does the rest of my family. Peanut Butter Cookies remind me of my Momma, and this Easter I am reminded not only of my Momma but also her presence with our risen Lord. I am so thankful for the hope we are given and the JOYful celebration that commences because of this hope!

Happy Easter, y'all!


Pat’s (Momma's) Peanut Butter Cookies
 
Ingredients:

2 ½ cups all-purpose flour

½ teaspoon baking soda

½ teaspoon salt

1 teaspoon baking powder

2 sticks butter (1 cup) (Momma suggested 1 stick of Blue Bonnet margarine and 1 stick of salted butter, but I use 2 sticks of unsalted butter, both at room temp)

2 tablespoons Crisco solid (plain)

1 cup granulated sugar

1 cup moist brown sugar, packed

2 large eggs, beaten slightly

1 cup smooth peanut butter (basically half of a regular container)

1 teaspoon vanilla flavoring

Optional: 1 cup M&M candies


Directions:

Preheat oven to 375 degrees. In a large bowl, sift flour, soda, salt and baking powder together, and set aside. In another large bowl cream sugars with electric mixer until well-blended. Add softened butter and Crisco and blend well; add eggs, peanut butter and vanilla. Mix thoroughly until smooth and fluffy. Do not use an electric mixer for the remaining steps. Use a spatula to combine flour mixture only long enough to form a smooth dough. (At this point add candies, like M&Ms, if using them) Using a cookie dropper or large tablespoon, dip rounded balls of dough to ungreased cookie sheets. Press cookies in a criss-cross fashion with fork dipped in flour. Bake 10-12 minutes, depending on your oven. You’ll want them to be very lightly golden. Remove and allow to sit on cookie sheet a minute before removing to countertop (aluminum foil or waxed paper lined) to cool completely before storing. Makes about 6-7 dozen, depending on size … “These are so yummy!” Momma says in her cookbook.
(Recipe Courtesy of "A Pinch of This, A Smidgen of That" cookbook by Patricia Rains
Momma's Peanut Butter Cookies, arranged on a lovely Spring platter for Easter.
 
Assemble all of your ingredients for the cookies, making sure your butter is at room temp. (M&Ms are optional and can be added later, after the cookie batter is made.)

Whisk dry ingredients together in one bowl.

 Blend sugars together.

Add butter, and cream sugar and butter together. (Add Crisco now, too, although I added it with the peanut butter, eggs and vanilla)

The mixture should become soft and fluffy.
 
Add the peanut butter, eggs and vanilla to the wet mixture, and blend.

This is what the final wet mixture should look like - basically like peanut butter.

 At this point, stop using the blender, and mix in the dry ingredients into the wet ingredients with a spatula. 

This is what the peanut butter dough will look like once blended thoroughly.

I took part of the batter and added regular M&Ms to give it a fun color.

I scooped out the dough balls using a cookie scoop and placed the cookie dough on a silicone baking sheet.

Using flour and a fork, I made a criss-cross pattern with the cookies. (You can do the criss-cross pattern on the M&M peanut butter cookies, too, but I chose not to on this one.)

 To the regular peanut butter cookies, I also added a sprinkle of sugar on top before baking.
 

The cookies are ready to bake!
 
The finished product - so yummy!

 
EnJOY this Easter!

Wednesday, March 13, 2013

Celebrating National Pi Day


Pi Day is the unofficial holiday that celebrates the mathematical constant pi (π) on March 14 in the month/day date format because the digits in this date correspond with the first three digits of π (3.14). It has become an international observance that is celebrated live and online and also celebrates Albert Einstein’s birthday. (Source: http://www.timeanddate.com/holidays/world/pi-day) It also happens to be my sweet grandson, Jacob's birthday, too! (HAPPY BIRTHDAY to you, Jacob!) What a great day for a celebration!
 
There are many activities that celebrate Pi Day such as games, eating “pi” foods, converting things into pi, making strange mathematical endeavors like having a contest to see who knows the most digits of pi. Many people celebrate Pi Day by eating pie and discussing the relevance of π. Many teachers will use this date to engage students in activities related to pi by singing songs and carols about pi and developing pi projects. Some bakeries offer discounts on their products that have the letters "pi" together in a word. It's a great excuse for pie-baking and pie-eating contests. It's also a great time to share your favorite pie recipe.

No matter what time of year, no matter how hot or how cold, my favorite pie of all has to be Coconut Cream.

Doesn't that make you want to celebrate?!! (My theory: You can never have too many desserts! Below: Fried Apple Pies (recipe and tutorial here-- http://www.pinchofthissmidgenofthat.blogspot.com/search/label/Fried%20Apple%20Pies) , Brownie Bites, Buttermilk Pound Cake, and COCONUT CREAM PIE!)

My favorite place to eat the pie is at Charlotte's Eats and Sweets in Keo, AR (check out this article from Southern Living Magazine-- http://www.southernliving.com/travel/best-southern-pies-00417000067560/page12.html), but since I can't always go to Keo for pie, I have to make my own. Here's the recipe I use for the best Coconut Cream Pie in "A Pinch of This ... A Smidgen of That" cookbook (page 124):

Pat's Coconut Cream Pie

PIE FILLING Ingredients:
1 (9-inch) pie shell, baked and cooled
1 to 1 1/2 cups granulated sugar (use more sugar for more filling, more volume)
2 Heaping T. cornstarch
2 Heaping T. flour
1/4 to 1/2 tsp. salt
1 1/2 cups milk (2% or half & half... depends on how rich you want the pie)
2 to 3 T. butter (cold from the refrigerator)
5 eggs (use 4 if you're using less sugar), separated, at room temp. (Hint: separate when COLD, then allow to come to room temp before mixing them for meringue)
1/2 tsp. vanilla
1/2 tsp. coconut flavoring
2 MORE T. butter (cold)
1/2 C. moist flaked coconut (Baker's bagged coconut, packed gently), plus extra coconut for garnishing the top of the pie.
 
MERINGUE Ingredients:
4 or 5 egg whites, at room temperature (be sure not to contaminate whites with the yolks of any oils from your fingers or utensils. Do not begin cooking pie filling until egg whites have come to room temperature, because you will be making the meringue and topping the filling while it is still HOT. If you fail to cover the pie with meringue while hot, and the pie gets cold, it will cause the meringue to "sweat" or get drippy and pull away from the sides. It needs to go on while the filling is HOT and bake while it is HOT to brown the top.)
Wisp of salt (scant 1/4 to 1/2 tsp.)
1/2 to 1 1/2 tsp cream of tartar
1/4 tsp. clear vanilla flavoring
1/2 tsp. coconut flavoring
10 T. granulated sugar.
Moist flaked coconut for topping meringue

DIRECTIONS: (Don't let the lengthy directions scare you! I'm a "detail" person---maybe even a little OCD, so I probably gave you more information than you needed!)
1. In a heavy saucepan or double boiler, use a whisk to combine sugar, cornstarch, flour, and salt. When dry ingredients are well combined, gradually add milk (or mixture of milk, as above). Once well mixed into the dry ingredients and all lumps disappear, add cold butter and bring mixture to a boil over medium to medium-high heat, stirring gently, but constantly to keep from sticking until thick and smooth. Once boiling and beginning to thisken, beat egg yolks well, stir in a little of the hot filling mixture and pour back into the sauce pan. Cook over medium heat (just bubbly) for 2 minutes, stirring constantly, so eggs have a chance to cook. Remove from heat, and stir in the additional 2 T of butter and the coconut and vanilla flavorings. Allow to sit while preparing meringue.

2. Add salt and cream of tartar to egg whites that are at room temperature.

3. Using highest speed of your hand mixer, beat egg whites until the mixture looks frothy or foamy. Immediately, add all 10 T. of sugar while you still have enough "liquid" (not all air and foam) to dissolve it. Return to highest (whipping) speed of your mixer and beat in as much air as possible to make meringue fluffy with soft peaks. When you lift the beaters from the beaten whites, the peaks will stand straight and then tip over. Add the flavorings and continue to beat until the meringue pulls into pointy peaks that stay that way. It's now ready to use.

4. Fold in 1/2 C moist shredded coconut into the filling (still in the saucepan) just before folding in 1/3 of the prepared meringue. Be sure to fold in all the way to the bottom and sides of the pan, so the meringue is evenly distributed, but do not beat--gently turn over the filling to fold in the meringue.

5. Have oven preheated to 350 F. Pour filling into cooled pie shell, and beginning at the edges spread remaining meringue around the rim of the pie, then fill the center and work your way out to the edges using a spoon to swirl waves or ripples into the meringue. You can use the back of a spoon to pull the meringue up into peaks all over the pie. Don't wait for the pie to cool! Do this while the filling is HOT. HINT: Make sure to seal the edges by spreading the meringue to the very edges of the pastry, so none of the inside filling shows. I use the tip of a table knife to do this--just to drag a thin layer over the edge of the fluted crust so it seals the pie while baking and doesn't pull away when it begins to cool.

6. If you desire, you can sprinkle moist flakes of coconut over the top, just before placing it in the oven to toast the top of the meringue. Bake the meringue low and slow at 325 to 340 F (you'll learn which does best for your oven and know which to use) for a bout 15 to 20 minutes. Start peeking through the "window" on your oven door (DO NOT OPEN THE OVEN) at about 15 minutes.

7. When done, remove to a cooling rack or countertop to allow the pie to cool completely--which will take several HOURS, so be patient and find something else to do so you won't be tempted to cut this yummy, great smelling pie! Keep it sitting in a place free from drafts (fans blowing, doors opening, an open window, kids galloping through the house, etc.) (grin)

8. When ready to cut, for a clean slice, us a hot, dampened serrated knife (pass one through a stream of your hottest tap water and blot dry before cutting. This also works well for cheesecakes.)

9. EnJOY every yummy bite!

10. Store leftovers in the refrigerator up to one week (it won't last that long, but you can try)!

 If Coconut Cream Pie isn't your favorite, try one of these recipes. You can never go wrong with peanut butter!
 
No-Bake Peanut Butter Pie
(A similar recipe can be found on page 129 in "A Pinch of This ... A Smidgen of That" cookbook. I think this recipe ---below--- is much easier and takes less ingredients than the one in the cookbook. Both are very good.)
No Bake Peanut Butter Pie

Ingredients
1 - 8oz package cream cheese, softened
1 - cup powdered sugar
3/4 - cup creamy peanut butter
2 Tablespoons milk (2% is okay)
8 oz. container of whipped topping (I like Cool Whip best.)
1 baked (and cooled) 9-inch pie crust (or if you prefer, you can use graham cracker crust)
1/2 cup salted dry roasted peanuts (optional... most of the time, I don't use these, but I this time so I could photograph it.)
 
Directions
In a small bowl, beat the cream cheese, powdered sugar, peanut butter, and milk until light and fluffy. Using a spatula, fold in whipped topping. Spoon into crust and spread evenly. Coarsely chop the peanuts and sprinkle over the top to garnish. Refrigerate for at least 4 hours before serving. Yield: 6-8 servings.


And, if peanut butter is off limits for you, how about some yummy chocolate?
 
Nestlé’s TOLL HOUSE CHOCOLATE CHIP PIE
(Page 122 in "A Pinch of This ... A Smidgen of That" cookbook)
Here's another view ... I love pretty pies! :-) especially when they taste even better than they look!
Nestlé’s TOLL HOUSE CHOCOLATE CHIP PIE
Ingredients
1 unbaked 9-inch deep-dish pie shell
2 large eggs
1/2 cup all-purpose flour
1/2 cup granulated sugar
1/2 cup packed brown sugar
3/4 cup (1 1/2 sticks) butter, softened
1 cup (6 oz.) Nestle Toll House Semi-Sweet Chocolate Morsels
1 cup chopped nuts
Sweetened whipped cream or ice cream (optional)
Directions
PREHEAT oven to 325° F.

BEAT eggs in large mixer bowl on high speed until foamy. Beat in flour, granulated sugar and brown sugar. Beat in butter. Stir in morsels and nuts. Spoon into pie shell.

BAKE for 55 to 60 minutes or until knife inserted halfway between edge and center comes out clean. Cool on wire rack. Serve warm with whipped cream.
 
EnJOY!!
Whether you celebrate National Pi Day or just want to bake a pie for your family (or friend, or neighbor), I hope you enJOY your time in the kitchen and you are able to BLESS someone with your delicious pies.  (Don't forget to check out the Fried Apple Pies recipe and tutorial here -- http://www.pinchofthissmidgenofthat.blogspot.com/search/label/Fried%20Apple%20Pies). If you use one of these recipes from today's post, take a photo and email it to me! (pkrains@gmail.com) I'll post it here. You never know, you might just win a cookbook. :-)
 
I just received two photos of pies from a blog follower, Alan Williams, who made the pies to share with his co-workers. They look delicious! Great job, Alan! Congratulations on winning a copy of "A Pinch of This ... A Smidgen of That" cookbook!


Saturday, July 21, 2012

Coooookie MONSTER'S Cooookies!

One of the best parts of my "Nanna Days" with Samuel is getting to watch Sesame Street with all its great muppet characters, each special in their own way. One of our favorites is the segment where Prarie Dawn introduces the "letter of the day" while having a plate of HUGE, MONSTER-SIZED cookies on hand to appease Cookie Monster (so he won't eat the letter of the day before she introduces it). Cookie Monster always manages to eat not only Prarie's plate of HUGE yummy cookies, but he also eats the "letter" before he's finished. I love this part, because it always makes Samuel giggle (with a special twinkle in his eyes that Nanna can't resist).

Today, we're celebrating our favorite muppet by making Cookie Monster's Cookies. Although Cookie Monster won't actually observe his birthday until November 2 (which is also Ken's and my wedding anniversary :-), I wanted to honor him today with a new cookie recipe, named especially for him (by me). So, "Happy EARLY Birthday, Cookie Monster! If you were here, I'd let you be the first to sample this special cookie, named just for YOU!"

I also want to introduce to you one of my boys' (James, Jacob, and Samuel) favorite no-bake cookies, since it's really HOT outside right now, and it's a perfect time to make these nutritious and delicious treats. (I've made no less than four batches of these over the past week. Someone likes them!)

Let's begin with the Cookie Monster's Cookies.
(I apologize for not having step-by-step photos, but I did take pictures of the final product so you can see how yummy these are.) If you have questions, you can always email or message me. I'd be happy to help.

So, here's what you need (Go gather your ingredients and get started! AND don't forget to print or save the recipe to your files.):
COOKIE MONSTER'S COOKIES

Ingredients:
2 cups all-purpose flour
1/2 teaspoon baking soda
1/2 teaspoon salt
3/4 cup unsalted butter
, melted
1 cup packed brown sugar (light might work best... I used dark, but next time I'll use light.)
1/2 cup white sugar
1 teaspoon vanilla extract
1 egg

1 egg yolk
2 cups semisweet chocolate chips

Directions:
Preheat the oven to 325 degrees F (165 degrees C). Line 2 large cookie sheets with parchment paper.


Sift together the flour, baking soda and salt; set aside.

In a medium bowl, use an electric mixer to cream together the melted butter, brown sugar and white sugar until well blended. Beat in the vanilla, egg, and egg yolk until light and creamy. Blend in the sifted ingredients until the flour is just taken up. Do not overbeat. Use a spatula or wooden spoon to stir in the chocolate chips. Drop cookie dough 1/4 cup at a time onto the prepared cookie sheets or use an ice cream scoop to portion out uniform amounts. Cookies should be about 3 inches apart. These will spread out as they bake, so leave them in ball shapes when you place the dough on the cookie sheets to bake.

Bake for 17 to 19 minutes in the preheated oven, or until the edges are lightly toasted. (If you choose to make smaller---not monster-sized---cookies, be sure to reduce your cooking time. For an average-sized cookie, I'd bake about 12 to 14 minutes, but watch your first batch so they don't burn!)  Cool on baking sheets for five minutes before transferring to wire racks or lined cabinet top to cool completely.


When Cookie Monster eats something, he makes a very distinct, loud munching "noise", often interpreted as "OMM-nom-nom-nom-nom!" These big, fat, chewy, gourmet cookies are guaranteed to make you say, "OMM-nom-nom-nom-nom!" or maybe just "YUMMMMM!"

EnJOY!
Our next recipe is for a smaller, but equally chewy/gooey and delicious, cookie. These are named after my own favorite resident cookie monsters: James, Jacob, and Samuel Rains! I first started making these when James (now almost 36-years-old) was a little boy. I've had the recipe published in two different cookbooks where I titled them "James' Peanut Butter Crunchies" (see page 150 in "A Pinch of This... A Smidgen of That" Cookbook). I should probably revise the title since I now have two more "monsters" who enJOY them.

One of my favorite things about this cookie is that I usually have all the ingredients on hand and don't have to make a trip to the store. Another favorite thing is that I can make them in the heat of the summer without ever firing up the oven (This is also one of Ken's favorite parts of this cookie! It may be why we've consumed four batches of them over the past week or so---of course, we gave some of them away, as well. It's always nice when a recipe makes more than you need, so you can share with friends and family.) Another plus for this cookie is that it's nutritious---who can improve upon ingredients like peanut butter and corn flakes?---so you don't have to feel guilty when the little ones ask for mid-morning or mid-afternoon snacks. They're a nice "pick-me-up" to go along with your coffee breaks, too. Kids aren't the only ones who enJOY these.

So, let's get started making  "James' Peanut Butter Crunchies" ...
JAMES' PEANUT BUTTER CRUNCHIES

INGREDIENTS
1 Cup Sugar
1 Cup White Karo Syrup
½ stick butter (cut in small slices to hasten melting)
½ tsp. vanilla flavoring
2 Cups smooth (or crunchy, if you’re creative J) Peanut Butter
6 Cups Corn Flakes (use 5 for a softer cookie.) (I like Kellog's Sugar Frosted Flakes)

(OPTIONAL: If you’re REALLLLY CREATIVE, toss in some peanut butter swirled chocolate chips after you’ve added the peanut butter/syrup-sugar mixture to the corn flakes. Be sure it’s cooled just a bit or it will melt your chips.)
DIRECTIONS:
Measure corn flakes into a large mixing bowl and set aside.

Combine sugar and Karo syrup in a heavy sauce pan and bring to a boil, stirring constantly. Boil for approximately 2 minutes (no less) after it reaches a rolling boil (one where bubbles can’t be stirred down with your spoon/spatula). NOTE: I always set my timer for 2 minutes just as soon as I have a full boil that I can’t stir and make disappear. 


 Remove from heat and add butter pieces and vanilla. Stir well and add peanut butter until completely taken up into the mixture and no lumps remain. (Don’t stir too long or it will get too thick to pour.)

Pour mixture evenly over corn flakes and lightly mix with a spatula, then spoon or use a cookie scoop to transfer portions to foil or waxed paper lined cabinet. Cool completely. Store in covered container. Makes about 4 to 5 dozen, depending on how large you make the cookies.
I hope you enJOY making and eating these cookies with your resident "Cookie Monster(s)".


Monday, September 26, 2011

By Popular Demand


They say a picture is worth a thousand words, and it must be true. You never know what kind of response a photo will evoke when you post it on the Internet. I posted a picture of a Reese's Peanut Butter Cheesecake that I made for a shower last week, and I've had more email requests for the recipe than I've had time to answer. So, today, I decided to try and remember what I did and "write it down" for those of you who asked for it. Actually, I modified the "My Favorite Cheesecake" recipe (P. 103) in "A Pinch of This... A Smidgen of That" cookbook, so that's where we'll begin... It's basically a "New York" style cheesecake with some optional topping ingredients thrown in, but when I decided to make something "chocolate and peanut butter," I had to figure out a way to work with the recipe. I hope you can make sense out of my "notes" and "optional additions." If you can't, you can always email or call me.

This won't be a "normal" blog with tutorial photos, because I didn't take photos of the process when I was making the cheesecake. I only photographed the finished product at the shower. So, I apologize for not having step-by-step instructions for you. As I said, holler at me, if you have further questions. And, I hope it turns out as YUMMY for you as it did for us. We enJOYed eating the leftovers! I had enough batter to not only fill my sprinform pan and bake the very thick cheesecake, but also to fill 24 cupcake holders! I used Oreo Cookies (whole ones) for the bottom crusts and drizzled melted semi-sweet chocolate over the top of the "mini-cheesecakes." They were just as yummy as the full-sized version.

Ok, here's the recipe... and I warn you, I'm a "detail" person, so it's going to look long and scary at first, but it's really EASY, I promise. I just like to go into lengthy details so you understand what to do! :-)

MY FAVORITE CHEESECAKE


Crust Ingredients: (see options below, if you're making Reese's Peanut Butter Version)

Graham Cracker Crumbs (or a large prepared graham cracker crumb pie crust dumped and pressed into your greased springform pan).
2 Tbsp. sugar
2 Tbsp. butter, melted

In a medium bowl, mix graham cracker crumbs with sugar and melted butter. Press onto bottom and part of the way up the sides of a springform pan.

Cheesecake Ingredients: (see additional ingredients below if making Reese's PB Version, or if you want to make a different topping for the plain cheesecake.)
1 lb. carton small curd cottage cheese, well drained, then blended until smooth
2 - 8 oz. Pkgs. Cream cheese, softened
1 ½ cups granulated sugar
4 eggs
1/3 cup cornstarch
1 T. lemon juice
1 tsp. vanilla
½ cup salted butter, melted
1 – 16 oz. carton sour cream

OPTIONAL: Sour Cream Topping:
1 - 16 oz. carton sour cream
¾ to 1 Cup sugar
1 tsp. clear vanilla

OPTIONAL: Orange Topping:
1/2 cup ground tangerines or oranges
1 cup sugar

OPTIONAL for a REESE'S PEANUT BUTTER CHEESECAKE:
  • 2 OREO Cookie Crumb Crusts, dumped into the springform pan and pressed until firm in the bottom and up the side of the pan.
  • 1 Cup Creamy Peanut Butter
  • 8 oz. Dark Baking Chocolate (8 Squares melted), to coat the inside of the crust
  • Sufficient Reese's Peanut Butter Cups (I quartered the small ones... 10-15 before I quartered them) to cover the bottom of the crust and chocolate coating.
  • Mini-Reese's or quartered pieces/chunks of Reese's candies to place randomly over the top after the cheesecake is finished baking.
  • 1/2 Cup semi-sweet chocolate chips, melted (to drizzle on top for decoration)
  • Icing for garnish around the bottom (optional)
  • 24 whole OREO COOKIES to make Mini-cheesecakes with leftover filling (optional)
BAKING DIRECTIONS (FOR ALL VERSIONS!):
Preheat oven to 325 degrees. Place a shallow pan of water in the lower rack or bottom of your oven. This will add moisture while baking and keep your cheesecake from cracking on top. Be sure to add enough water to keep it from going dry during baking. I usually use a jellyroll pan (like a large deep cookie sheet) and add it as full as I can with water. PREPARE a graham cracker CRUST in the bottom of a LARGE springform pan. (See back of Nabisco Graham Cracker Crumbs box for recipe. OR, do as I do--- purchase a large pre-made graham cracker crust, or a couple of small crusts, and dump them into the springform pan after you spray the bottom and side really well with nonstick coating. Use your fingers and palm of your hand to press the crust firmly until smooth and well packed in the bottom of the pan. Set aside until you mix the filling. It is NOT necessary to bake this before pouring in the filling.)
NOTE: IF YOU ARE MAKING THE REESE'S PEANUT BUTTER VERSION, YOU WILL NEED TO USE THE OREO COOKIE CRUMB CRUST HERE INSTEAD OF GRAHAM CRACKER CRUMBS. I USE TWO OF THE PREMADE CRUSTS, WHICH ARE SMALL. THEY WILL FILL THE BOTTOM AND PART OF THE WAY UP THE SIDES. DON'T WORRY IF THEY DON'T GO ALL THE WAY TO THE TOP. ONCE LINED, MELT 8 OZ. --or 8 squares-- BAKING CHOCOLATE AND SPREAD OVER THE BOTTOM OF THE CRUST, THEN, REFRIGERATE UNTIL READY FOR FILLING. THIS ALLOWS THE CHOCOLATE TO HARDEN BEFORE YOU ADD THE FILLING.

PREPARE FILLING (for ALL VERSIONS): Blend the drained cottage cheese (don’t worry if it doesn’t all drain out.) in a food processor (blender) until very creamy (looks like sour cream when ready). Beat cream cheese at high speed of mixer until creamy. Add the blended cottage cheese and mix well. (NOTE: IF MAKING REESE'S PEANUT BUTTER VERSION, ADD PEANUT BUTTER WITH THIS CREAM CHEESE MIXTURE AND BLEND WELL.)  Add sugar and beat well. Add eggs, one at a time, beating after each addition. Reduce speed to low. Add cornstarch, lemon juice, and vanilla. Blend well. Add melted butter and sour cream. Mix until all is well blended. Pour into prepared pan. (NOTE: IF MAKING REESE'S PB VERSION, YOU ONLY NEED TO FILL YOUR PAN ABOUT 3/4 FULL. YOU WILL HAVE ENOUGH LEFTOVER FILLING TO MAKE SOME MINI-CHEESECAKES. I USED MEDIUM SIZED CUPCAKE TINS LINED WITH CUPCAKE PAPERS. I HAD JUST ENOUGH TO FILL 24 CUPCAKES. I FILLED THEM ABOUT 2/3 FULL. I BAKED THE CUPCAKES AT 325 DEGREES FOR ABOUT 25-30 MINUTES. AFTER THESE BAKED, I DRIZZLED THE TOPS OF SOME WITH WITH MELTED CHOCOLATE AND GARNISHED OTHERS WITH A SOLID LAYER OF MELTED CHOCOLATE AND A "STAR" OF PIPED ICING.) Bake cheesecake for 70 minutes at 325. Turn off oven and leave cheesecake inside with oven door closed for at least 2 hours (overnight is best). Remove and cool completely before removing sides of pan. (I like to let mine sit on a cookie sheet for a while --until it comes to room temperature---before I remove the side of the pan.)

NOTE: If you choose to top the cheesecake with a sour cream topping instead of the orange topping below, you will need to add the topping as soon as it finishes baking (or within the first 30 minutes if you need time for it to settle a little to give space at the top) and leave it in the 325 degree oven for about 10 minutes before turning the oven off.

FOR SOUR CREAM TOPPING:
Mix well:
1 - 16 oz. carton sour cream blended with ¾ to 1 Cup sugar and 1 tsp. vanilla. Spread evenly from the outside rim (touching rim) to the inside middle. Smooth flat on the surface. Return the cheesecake to the oven for a final 15 minutes to “set” the topping. Turn the oven off and DO NOT OPEN THE DOOR. Allow it to sit for about 2 hours (or overnight) to cool before removing to cool at room temperature. Once cool, slice a sharp knife around the rim of the springform pan and open the spring latch to remove (lift straight up for smoother sides).

FOR ORANGE TOPPING:
(NOTE: I’ve never used this. I always use the sour cream topping. However, a friend--Barbara--makes this, and it is delicious. It’s just too much trouble for me.) Combine ground fruit with sugar and stir over moderate heat until sugar melts. Cook, stirring frequently, until it thickens. Cool and spoon over cheesecake. Don’t overcook or it will be hard. (You might also use orange marmalade for this step.)

FOR REESE'S PEANUT BUTTER CUPS TOPPING:
As soon as the cheesecake is done (about 70 minutes), open the oven briefly and randomly place mini-Reese's cups (or chopped Reese's cups) around over the top of the cheesecake, DO NOT REMOVE THE CHEESECAKE FROM THE OVEN. Do this as quickly as possible and close the door. Turn off the oven and allow the cheesecake to sit in the oven for 1 - 2 hours before removing it to a cookie sheet or countertop to cool to room temperature.  Once cool, slide a sharp knife around the rim of the springform pan and open the spring latch to remove (lift straight up for smoother sides). Melt the semi-sweet chocolate chips in your microwave and drizzle one direction then the opposite direction over the top and down the sides. Refrigerate and enJOY! :-)


Thank you to all who commented on the photo and requested the recipe. Hope you enJOY making sharing your creation with your family.
Blessings!
Pat

Friday, February 11, 2011

Chocolate = LOVE!


For many, Valentine’s Day is the greatest of holidays, because it celebrates the greatest of emotions--LOVE. One of the most popular Valentine’s Day gifts is chocolate. Chocolate is composed from numerous compounds, which act upon the brain, producing a sense of delight that no other substance can replicate.

Cocoa, the primary ingredient in finished chocolate, is rich in antioxidants that have been proven to be good for heart health.

Other compounds in chocolate provide enhancement of mind and mood. According to numerous medical studies, caffeine is beneficial to overall health. Caffeine stimulates the central nervous system, stimulates the flow of blood in the brain, and increases secretion of serotonin. Caffeine enhances alertness, facilitates thought formation and decreases fatigue. It also improves mood overall, lifts the spirits, and enhances both cardiovascular function and respiration.

Taken by adults at a dose of 300 milligrams or less per day, caffeine is safe and beneficial. Chocolate is a modest caffeine source, with a 50 gram piece of dark chocolate yielding between 10 and 60 milligrams of caffeine, as compared with a five ounce cup of coffee, which can yield up to 180 milligrams. Modest amounts of caffeine in chocolate provide a healthy stimulant effect, suitable for consumption by all adults and children, except for the unusually sensitive or hyperactive. (SOURCE: http://www.foxnews.com/health/2011/02/07/chocolate-love-drug-good/ )

Chocolate gets right to the heart of mood enhancement by increasing the brain’s level of serotonin, the feel-good brain chemical. Serotonin plays a major role in positive mood, emotional health, proper sleep and balanced appetite, contributing to numerous behavioral and physiological functions. Decreased serotonin is a well-known factor in cases of depression. Increased brain serotonin promoted by chocolate elevates moods to more pleasant levels.

Violence, aggressive behaviors, and higher rates of suicide have all been associated with reduced brain levels of serotonin. Many people consume chocolate as a form of self-medication, whether they are aware of the fact or not. Chocolate’s serotonin elevating activity helps to modify mood in positive ways.

Probably the most influential "love compound" in chocolate is PEA, phenethylamine. This chemical stimulates the nervous system and triggers the release of pleasurable endorphins. PEA acts as a potent antidepressant in both sexes and rises during periods of romance. The giddy, restless feelings that occur when we are in love are due to a great extent to PEA, which significantly increases in the brain at that time. Some scientists dismiss this notion, claiming that the PEA in chocolate is metabolized too quickly to produce a significant mood-altering effect, but others disagree. Why else would chocolate be so intertwined with love and romance?

While we might encounter many agents in nature to boost libido, only CHOCOLATE equals LOVE in the equation of romance. In today's recipe, CHOCOLATE equals YUMMM! This recipe came from Ruth and Terry Dale. Ruth shared the recipe, while Terry made the recommendation! And, I have become addicted. They called these "Ol' Henry Bars," but for the sake of the holiday that is upon us, we're calling them "Be Mine Chocolate Bars."

So, here we go---Let's gather our ingredients and get started! Valentine's Day is almost here! I hope you and yours enJOY a very happy one, BLESSED with much CHOCOLATE and LOVE!

Patricia
p.s. Don't forget to copy and paste the recipe at the end of today's blog to your word processor so you can print it or file it in your records. EnJOY!
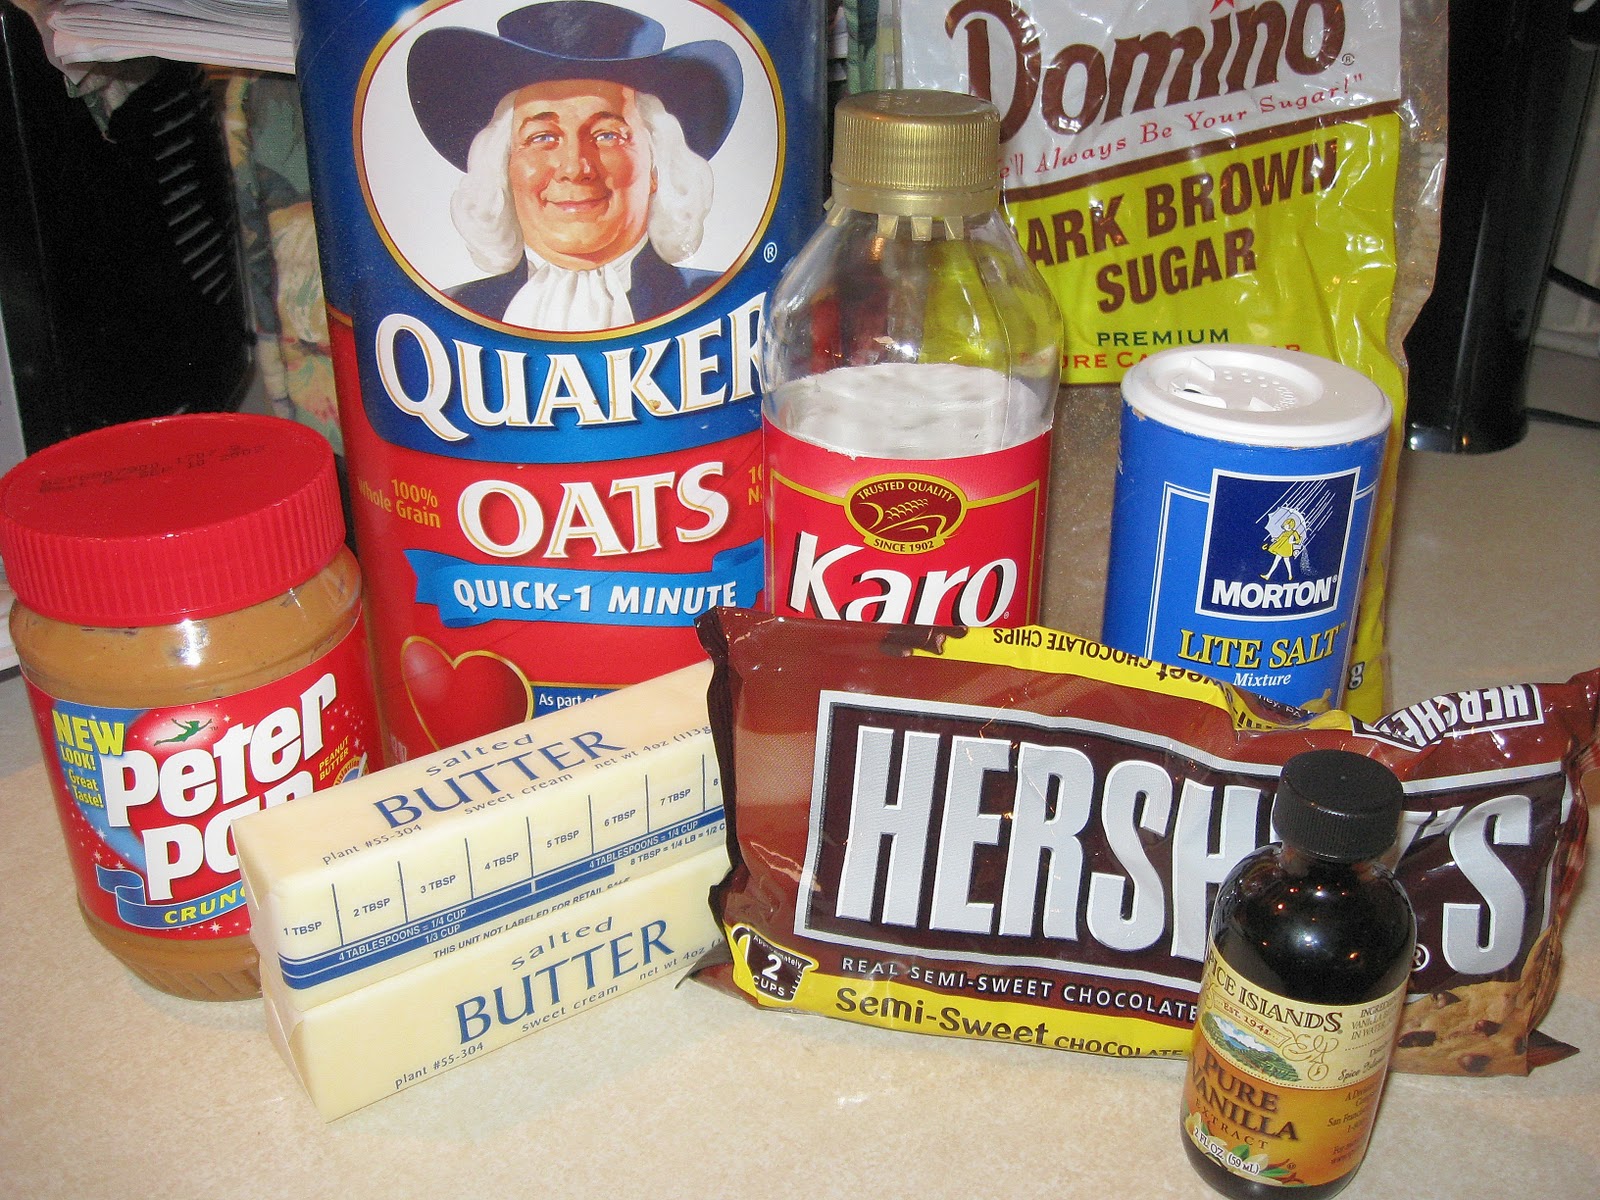
Gather butter, brown sugar, vanilla, oats, corn syrup, salt, chocolate chips, and peanut butter.

Cream butter and sugar.

Add vanilla, oats, corn syrup, and salt.
Beat with hand mixer until well blended.
Press firmly into a 9 x 13 pan. Bake at 375 degrees for about 12 to 15 minutes. (My oven baked it perfectly at 13 minutes.) 

Prepare topping ingredients. (You can substitute smooth peanut butter. I prefer crunchy.)


Melt chocolate and peanut butter, blending together, as you stirr constantly over medium heat. This doesn't take very long at all, so don't leave it!

Allow cookie base to cool slightly while preparing topping.

Spread melted mixture over slightly cooled cookie base.

Let cool. Cut into bars and store in refrigerator.

They are okay warm, but they are awesome cold from the fridge.


(House Rule: Always TEST the food before serving!... especially if it's CHOCOLATE! :-)
I refrigerated mine before cutting them into bars. I kept some on a platter at room temperature and stored the rest in a covered plastic container in the refrigerator.

Be Mine Chocolate Bars


INGREDIENTS:

10 Tbsp Butter
1 cup brown sugar
3 tsp. vanilla
4 cups quick oats
1/2 cup light corn syrup
dash of salt


DIRECTIONS:
Cream butter and sugar. Add vanilla, oats, corn syrup, and salt. Beat with hand mixer until well blended. Press firmly into a 9 x 13 pan. Bake at 375 degrees for about 12 to 15 minutes.

TOPPING INGREDIENTS:
1 cup of chocolate chips
2/3 cup crunchy peanut butter

DIRECTIONS:Combine chocolate chips and peanut butter in a medium sauce pan. (You can substitute smooth, but I prefer crunchy peanut butter.) Melt chocolate and peanut butter, blending together, as you stirr constantly over medium heat. This doesn't take very long at all, so don't leave it!


Spread melted mixture over slightly cooled cookie base. Let cool. Cut into bars and store in refrigerator. They are okay warm, but they are awesome cold from the fridge. (I refrigerated mine before cutting them into bars. I kept some on a platter at room temperature and stored the rest in a covered plastic container in the refrigerator.

Search Amazon.com for Be Mine Chocolate Bars